Last Updated on February 24, 2021 by Janell
DIY Breakable Easter Eggs are going to be part of every Easter basket! They are so easy and fun to make!
![]()
![]()
There are so many fun things to make with chocolate! First, it was the Hot Cocoa bombs around Christmas time. Then for Valentine’s Day, everyone wanted a breakable chocolate heart!


So of course we need something for Easter! So I am going to show you how to make a breakable chocolate Easter egg to add to Easter baskets this year!
They are really easy to make! All you need are the molds, candy to add to it, and really good chocolate!


Items Needed To Make Breakable Easter Eggs


You can get any kind of chocolate you can find but if you have a store that sells chocolate disks, they will taste the best! I bought some colored melting chocolates, so I am going to use them to decorate the eggs.
I used 1 cup of chocolate disks to make 6 whole eggs (12 half eggs).
Easter Egg mold kit with mini mallet and paintbrushes. The paintbrushes are very helpful to make sure you are getting an even layer of chocolate into the mold.
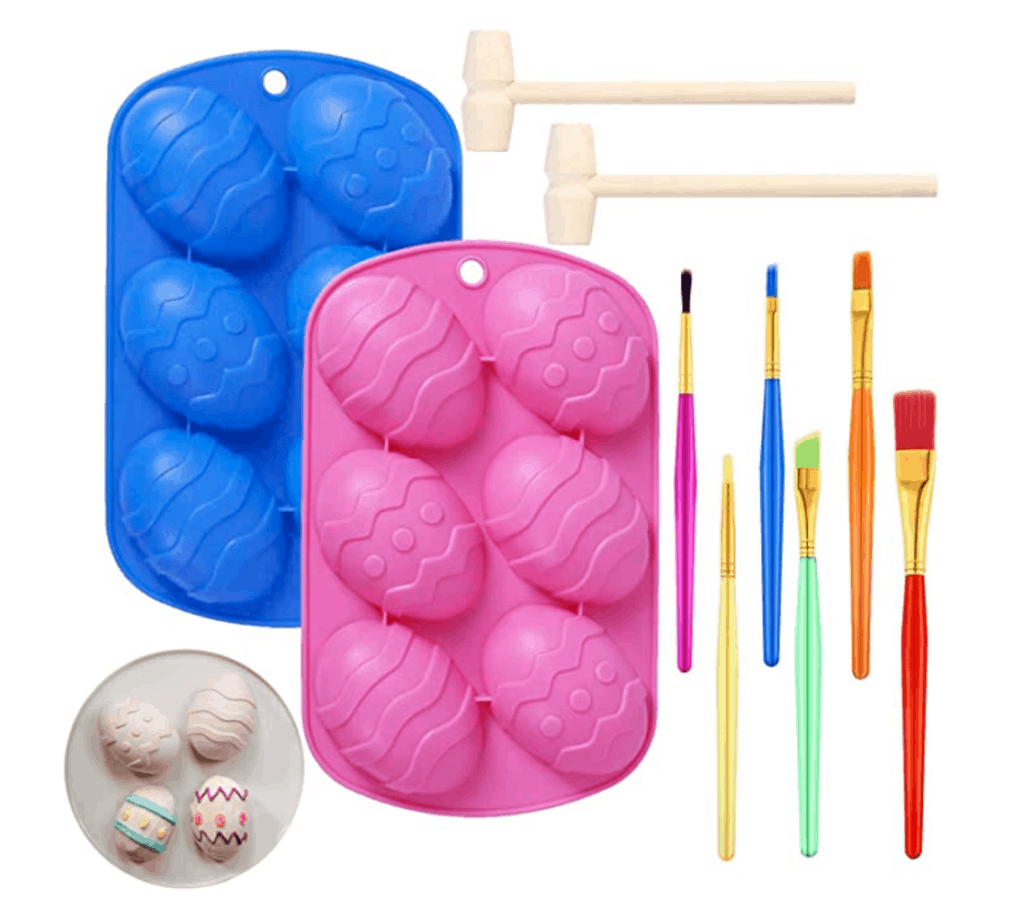

If you can’t get a kit, just make sure you get the silicone mold, some mini mallets, and paintbrushes.
You will also need a few small things to add into the eggs. You can add candy, tiny toys, money (wrapped in plastic), and more. Get creative! I had some Easter molds that I used to make more Eater chocolates to put into the egg.
Small plate – this is what makes the magic happen! You will heat up the plate int the microwave and then place the egg on it to heat up the edges. It will melt the edges just enough so that you can stick the 2 sides of the eggs together to make your breakable egg!


How to Make DIY Breakable Easter Eggs
- 1 cup chocolate disks
- 12 egg molds (they are about 6 inches long)
- paintbrushes
- filler candy
- Small glass plate
Instructions:
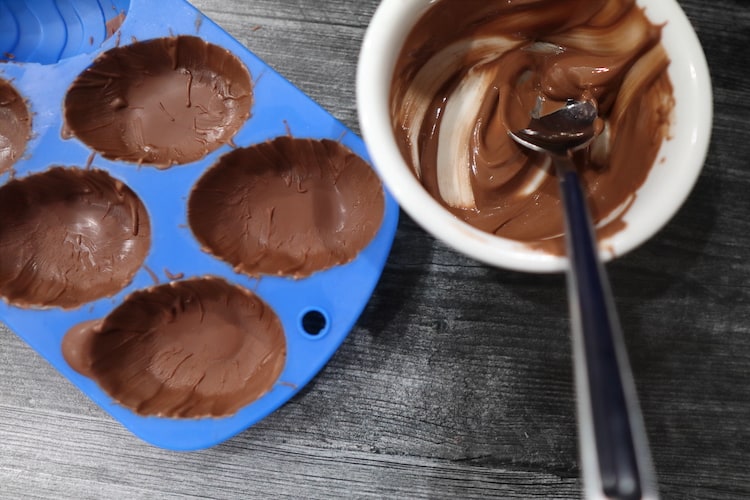

You are going to make 3 layers of chocolate in the egg mold. This will make sure it doesn’t break when you try to remove it from the mold. Place 1/3 chocolate disks in a microwave-safe bowl. Heat for 45 seconds and stir. Repeat in 15-second increments, stirring until smooth.
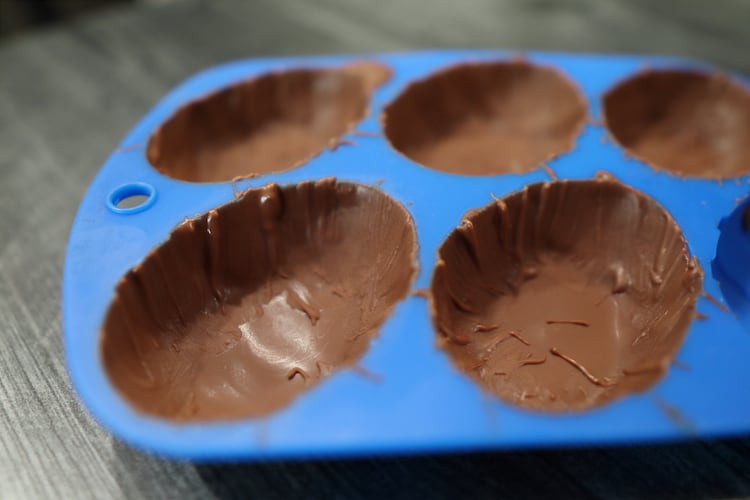

Add about 1 tablespoon of the melted chocolate to each egg. Swirl it around and use the paintbrush to get the chocolate all over the mold. Make sure you get it to the top of the mold. Place in the freezer for about 10 minutes.
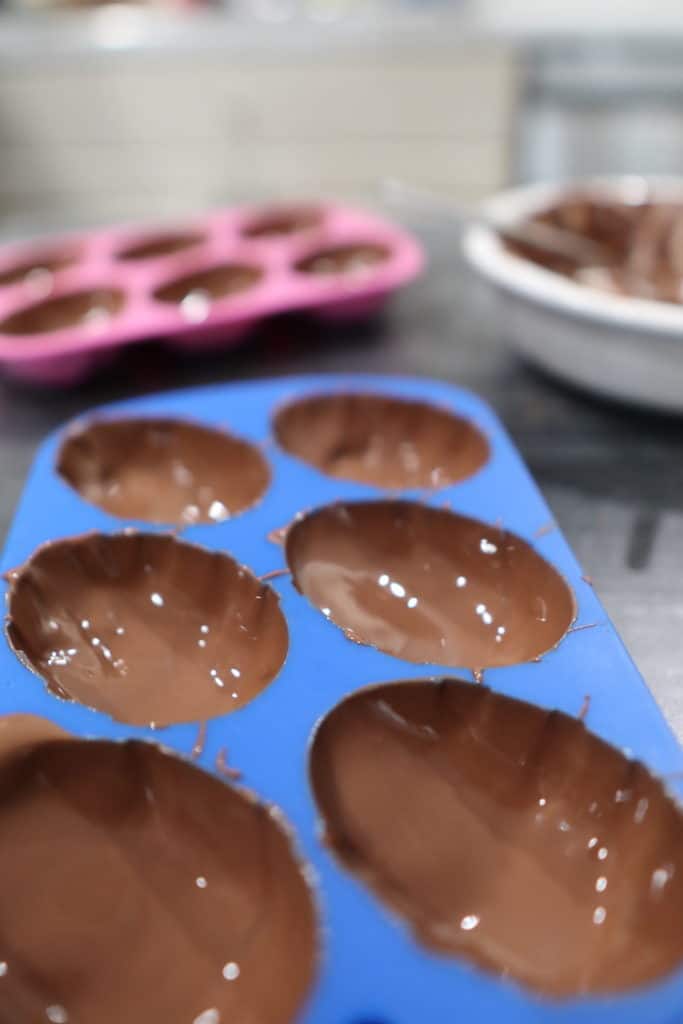

Repeat this process 2 more times.
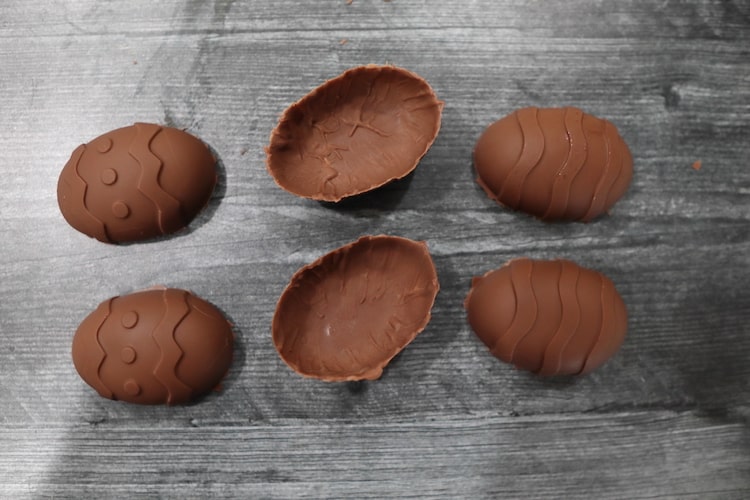

Very carefully remove the eggs from the molds. It’s ok if the sides aren’t very pretty – you can melt away those imperfections with the hot plate when you seal them.
Fill up 6 of the eggs with your treats.


Put a small, microwave-safe plate into the microwave. Heat for about 1 minute until it is warm. BE CAREFUL when you remove it, You may need to use oven mitts.
Take the empty side of the egg and set it on the plate. Move it around a little to melt the chocolate around the edges.
Place it on top of the filled part of the egg. It should melt the edges together.


Repeat this process with all the chocolate eggs.
When it is time to break the DIY Breakable Easter Eggs, grab your mini-mallet and hit it a few times until the chocolate breaks and reveals the fun surprise!
DIY Breakable Easter Egg


Ingredients
- 1 cup chocolate disks
- 12 egg molds (they are about 6 inches long)
- paintbrushes
- filler candy
- Small glass plate
Instructions
- You are going to make 3 layers of chocolate in the egg mold. This will make sure it doesn't break when you try to remove it from the mold. Place 1/3 chocolate disks in a microwave-safe bowl. Heat for 45 seconds and stir. Repeat in 15-second increments, stirring until smooth.
- Add about 1 tablespoon of the melted chocolate to each egg. Swirl it around and use the paintbrush to get the chocolate all over the mold. Make sure you get it to the top of the mold. Place in the freezer for about 10 minutes.
- Repeat this process 2 more times.
- Very carefully remove the eggs from the molds. It's ok if the sides aren't very pretty - you can melt away those imperfections with the hot plate when you seal them.
- Fill up 6 of the eggs with your treats.
- Put a small, microwave-safe plate into the microwave. Heat for about 1 minute until it is warm. BE CAREFUL when you remove it, You may need to use oven mitts.
- Take the empty side of the egg and set it on the plate. Move it around a little to melt the chocolate around the edges.
- Place it on top of the filled part of the egg. It should melt the edges together.
- Repeat this process with all the chocolate eggs.
- When it is time to break the DIY Breakable Easter Eggs, grab your mini-mallet and hit it a few times until the chocolate breaks and reveals the fun surprise!
The Best Easter No-Bake Dessert Recipes - Femina Unique
Tuesday 16th of March 2021
[…] Check it here. […]
20 Easter Treats for Kids
Wednesday 10th of March 2021
[…] DIY Breakable Chocolate Easter Eggs from Saving You Dinero […]